Table of Contents
This Quip Network node guide covers server selection, installation with Termius, automatic updates, wallet setup and the current points and quests.
Two weeks untill the Airdrop but the Leaderboard still free. Just take a look, I started my node 1 day ago and made some free daily check-ins – my placement is 231 and I have spend nothing yet (8$ for server after the month of usin’ lol)
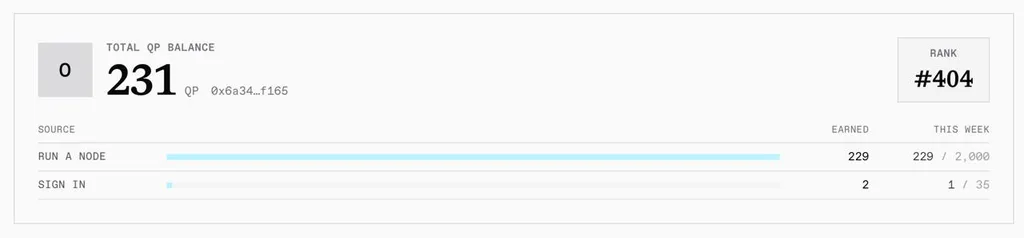
Updated 2 October 2026. This guide covers node, wallet setup, swaps, quests and the checks that separate a working node from credited campaign points. EVERYTHING ABOUT THIS PROJECT – 10$ MAX
Quip is worth looking at because participation is not limited to running infrastructure. There is a quantum-resistant wallet, a points program, social quests and an order book with both paper and live swaps. The official Points page says QP convert to $QUIP at TGE. That confirms a rewards program, not a fixed payout for every participant. Source: Quip Points
Some quests are time-sensitive. On 2 October, the dashboard displayed countdowns of 2 days and 4 days for specific collaboration tasks. There is no verified overall node deadline or exact TGE date in this guide. Do not confuse an expiring quest with the entire opportunity closing.
1 Some tech stuff
(that u don’t have to know, but your Claude have to)
Quip combines decentralized classical and quantum compute with post-quantum account protection. A CPU node does not turn your server into a quantum computer. It contributes classical computation to a network that also supports other hardware. Source: Quip developer portal
The current CPU deployment runs three containers:
| Container | Role |
|---|---|
quip-validator | Synchronizes the Aglais chain and exposes local chain RPC |
quip-cpu | Coordinates the CPU miner and submits qualifying work |
quip-dashboard | Provides the dashboard, API front door, log collection and embedded index database |
The deployment no longer requires a separate PostgreSQL or separate Caddy container. Its current configuration is different from old tutorials using [global] or the retired testnet. Source: current Compose file
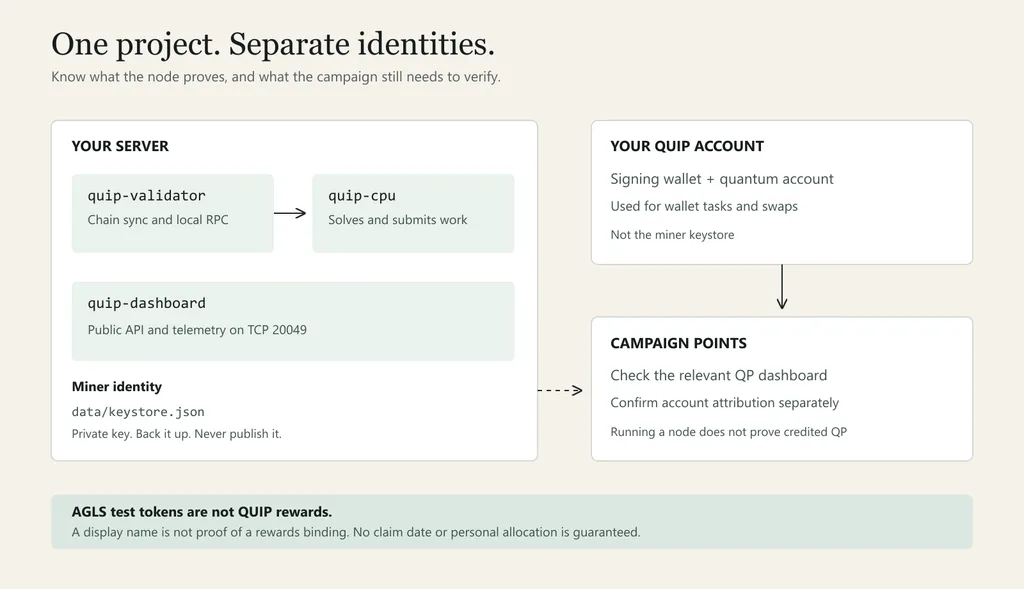
Three things must stay separate:
- AGLS: the testnet asset. It has no monetary value and is not convertible to $QUIP.
- Node identity: the native account controlled by the node’s private keystore.
- QP: the campaign points shown on the appropriate campaign website.
2 Choose a server
For this tutorial, use a fresh Ubuntu 24.04 LTS server with a public IPv4 address and root access.
| Component | Practical starting target |
|---|---|
| CPU | 2 vCPU minimal |
| RAM | 4 GB minimal |
| Storage | 40/60 GB or more SSD minimal |
| Network | Public IPv4, inbound ports under your control and sufficient traffic allowance |
| Operating system | Fresh Ubuntu 24.04 LTS |
| Access | SSH and root or sudo privileges |
if u want some better performance and work, so try to rent a better server (4vCPU / 8GB / 100SSD) – u don’t need a better one, this is the pretty server for this node. The cheaper server – less money waste
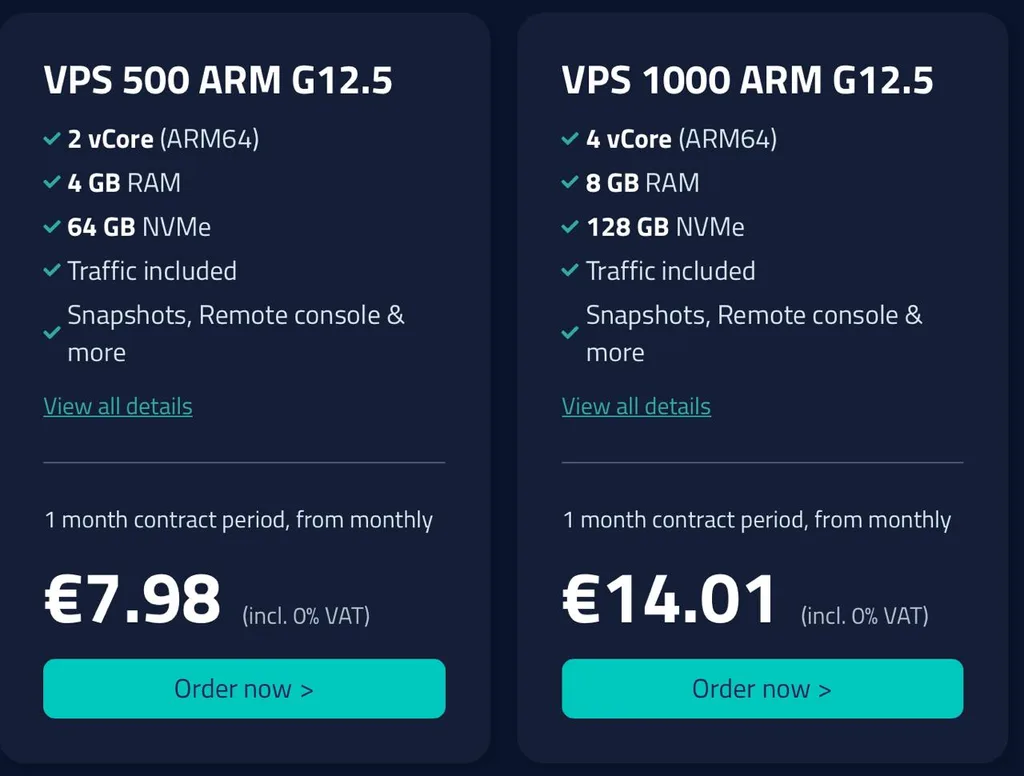
Hetzner and Netcup need an explicit policy check
Do not write that u want to run a node or anything about crypto. Better to erite that u are freelancer or vibecoder.
I’ve used to install on 2 of these servers from Netcup, u can use them too
https://www.netcup.com/en/server/vps
How to ren server?
- Register with your email.
- Select a Linux VPS or dedicated server that matches.
- Choose Ubuntu 24.04 LTS, not Debian for the commands below.
- Choose the country (the cheaper and that is not restricted)
- Just buy the server, u don’t have tomake logins or passwords.
- Wait until the server become active and check your mail for IP & Password
The installation does not require purchasing a second IPv4 address for this single-node setup. Multiple nodes have separate port, container-name, identity and campaign-policy questions; do not try to instal several nodes on 1 server.
3 Connect to the server
Connect to Your Server with Termius
1. Install Termius.
Open the app and go to Hosts → New Host.
2. Get your server credentials.
Find these in your hosting dashboard or welcome email: public IP address, SSH username, and server password. Your hosting account password is not necessarily your server password.
3. Fill in the connection details:
| Field | What to enter |
|---|---|
| Label | Any name, such as Quip Node |
| Address / Hostname | Your server’s public IP, without https:// |
| SSH Port | 22 (it should be in reccomended) |
| Username | root |
| Password | Your server’s login password |
Where to find pass and ip? Check you email.
4. Click Connect.
On your first connection, Termius displays the server’s SSH host-key fingerprint. Verify it through your hosting console or provider before accepting and saving it.
5. Wait for the terminal to open.
You should see a prompt similar to:
root@your-server:~#You are now connected. Enter the node installation commands directly in this Termius terminal with Ctrl+Shift+V (to copy Ctrl+Shift+C)
If the connection fails: check the IP, username, password, and SSH port. Permission denied usually indicates an authentication problem. Connection timed out means you should check server availability and firewall settings.
To disconnect: type exit or close the session. This does not shut down your server. A node running in detached Docker containers will keep working.
4 Install Docker
Paste this into the root terminal in Termius. Fresh Ubuntu 24.04 only: stop if Docker or Quip is already installed.
set -euo pipefail
[ "$(id -u)" -eq 0 ] || { echo 'Use a root shell.'; exit 1; }
. /etc/os-release
[ "$ID" = ubuntu ] && [ "$VERSION_ID" = 24.04 ] || {
  echo 'Use a fresh Ubuntu 24.04 server for this guide.'; exit 1;
}
if command -v docker >/dev/null 2>&1 || [ -e /opt/quip-node ]; then
  echo 'Existing installation found. Do not reinstall over it.'; exit 1
fi

apt-get update
apt-get install -y ca-certificates curl git make cron python3
install -m 0755 -d /etc/apt/keyrings
curl -fsSL https://download.docker.com/linux/ubuntu/gpg -o /etc/apt/keyrings/docker.asc
chmod a+r /etc/apt/keyrings/docker.asc
tee /etc/apt/sources.list.d/docker.sources >/dev/null <<EOF
Types: deb
URIs: https://download.docker.com/linux/ubuntu
Suites: ${UBUNTU_CODENAME:-$VERSION_CODENAME}
Components: stable
Architectures: $(dpkg --print-architecture)
Signed-By: /etc/apt/keyrings/docker.asc
EOF
apt-get update
apt-get install -y docker-ce docker-ce-cli containerd.io docker-buildx-plugin docker-compose-plugin
systemctl enable --now docker cron
id quip >/dev/null 2>&1 || useradd -m -s /bin/bash quip
usermod -aG docker quip
install -d -o quip -g quip -m 0750 /opt/quip-node
5 Add your nickname and public wallet address
Change the first three lines:
PUBLIC_HOST: your server’s public IP address.NODE_PREFIX: your nickname, for exampleAirdropsIo.EVM_WALLET: your full public EVM address, not a private key, seed phrase or the miner’s 32-byte native address.
The name becomes Oshman-0xYourWalletAddress. This reproduces the labeling convention used in our earlier install. It sets both the miner name and validator name. It does not prove that the campaign wallet is bound or that QP are being credited. The official configuration describes the name as public node metadata, not a wallet-binding field.
Paste this as root, after editing the three values:
PUBLIC_HOST='YOUR_PUBLIC_IPV4'
NODE_PREFIX='YOUR_NICKNAME'
EVM_WALLET='YOUR_PUBLIC_0x_WALLET_ADDRESS'

set -euo pipefail
[ "$(id -u)" -eq 0 ] || { echo 'Use a root shell.'; exit 1; }
python3 -c 'import ipaddress,sys; ipaddress.IPv4Address(sys.argv[1])' "$PUBLIC_HOST"
[[ "$EVM_WALLET" =~ ^0x[0-9a-fA-F]{40}$ ]] || {
  echo 'Replace EVM_WALLET with a full public EVM address.'; exit 1;
}
[ "$NODE_PREFIX" != YOUR_NICKNAME ] && [[ "$NODE_PREFIX" =~ ^[A-Za-z0-9-]{1,20}$ ]] || {
  echo 'Use a short nickname: 1-20 letters, numbers or hyphens.'; exit 1;
}
[ -d /opt/quip-node ] && [ -z "$(find /opt/quip-node -mindepth 1 -maxdepth 1 -print -quit)" ] || {
  echo 'Destination missing or not empty. Stop rather than overwrite a node.'; exit 1;
}
NODE_NAME="${NODE_PREFIX}-${EVM_WALLET}"
# Leave at least one CPU available outside the miner.
if [ "$(nproc)" -ge 3 ]; then CPUSET='0-1'; MINER_CPUS=2; else CPUSET='0'; MINER_CPUS=1; fi

runuser -u quip -- git clone https://gitlab.com/quip.network/nodes.quip.network.git /opt/quip-node
cd /opt/quip-node
runuser -u quip -- mkdir -p data
runuser -u quip -- cp env.example .env
sed -i -E '/^[[:space:]#]*(CHANNEL|PUID|PGID|VALIDATOR_NAME|QUIP_MINER_CPUSET|QUIP_MINER_MEM_LIMIT|DWAVE_API_TOKEN)=/d' .env
printf '\nCHANNEL=stable\nPUID=%s\nPGID=%s\nVALIDATOR_NAME=%s\nQUIP_MINER_CPUSET=%s\nQUIP_MINER_MEM_LIMIT=3g\nDWAVE_API_TOKEN=\n' \
  "$(id -u quip)" "$(id -g quip)" "$NODE_NAME" "$CPUSET" >> .env
runuser -u quip -- cp config/quip-miner.toml data/config.toml
sed -i \
  -e "s/^public_host = .*/public_host = \"${PUBLIC_HOST}\"/" \
  -e 's/^public_port = .*/public_port = 20049/' \
  -e "s/^# node_name = .*/node_name = \"${NODE_NAME}\"/" \
  -e "s/^# num_cpus = .*/num_cpus = ${MINER_CPUS}/" data/config.toml
chown quip:quip .env data/config.toml
grep -Fqx "public_host = \"${PUBLIC_HOST}\"" data/config.toml
grep -qx 'public_port = 20049' data/config.toml
grep -Fqx "node_name = \"${NODE_NAME}\"" data/config.toml
grep -qx "num_cpus = ${MINER_CPUS}" data/config.toml
runuser -u quip -- docker compose --profile cpu config --quiet
runuser -u quip -- docker compose --profile cpu pull
runuser -u quip -- docker compose --profile cpu up -d quip-validator dashboard
If a check fails, stop and inspect the template. Do not delete the checks to force an incompatible configuration through.
6 Start mining and enable updates
Wait for the validator to synchronize. It can take hours. Check its health:
docker inspect quip-validator --format='status={{.State.Status}} health={{if .State.Health}}{{.State.Health.Status}}{{end}}'Once it says health=healthy, run:
cd /opt/quip-node
runuser -u quip -- docker compose --profile cpu up -d cpu
docker ps --format '{{.Names}}' | grep -qx quip-cpu
runuser -u quip -- /opt/quip-node/cron.sh --install
runuser -u quip -- crontab -l
docker compose --profile cpu ps
curl -fsS http://127.0.0.1:20049/api/v1/status | python3 -m json.tool
curl -fsS 'https://check.quip.network/checkport?port=20049'
echo
curl -fsS 'https://check.quip.network/checkport?port=30333'
echo
Look for miner_registered: true, is_mining: true, healthy validator/dashboard, and reachable: true for both public TCP checks. Repeat the status check after a minute: the chain head and work counters should advance. A zero proof count alone does not mean the miner is broken. Hourly cron updates images, not repository files.
The miner creates its own data/keystore.json. Back it up privately through Termius SFTP and keep it in encrypted storage. Never send it to support or overwrite it with your EVM wallet key. Back up .env and data/config.toml too.
7 Connect your campaign wallet separately
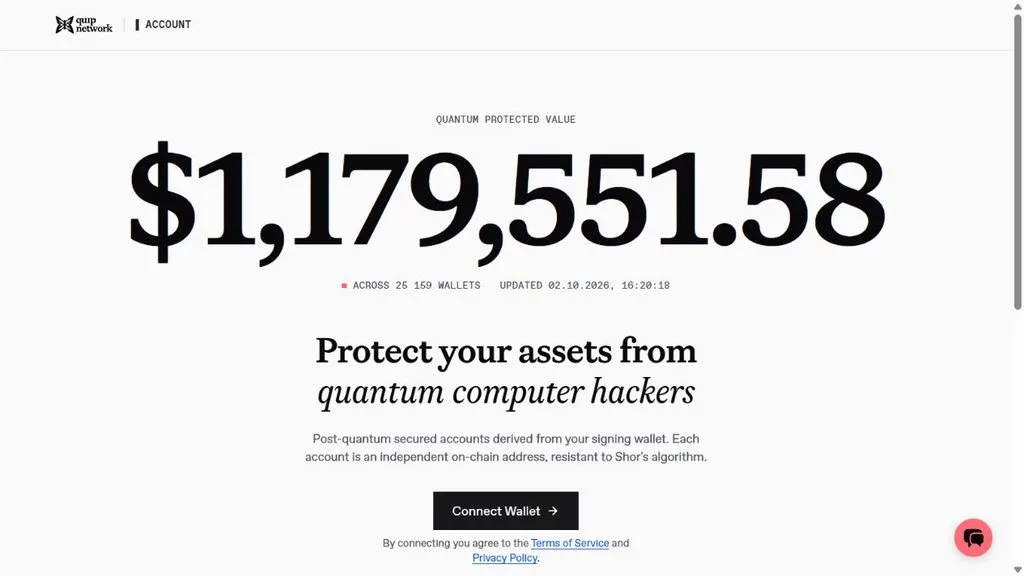
Open Quip Account in your normal browser, connect a dedicated wallet you control, and follow the current quantum-account setup. Complete the wallet task and other live tasks on Quip Quests. Check Quip Points using the address type required by that campaign.
There is no verified EVM_WALLET binding setting in the miner template. In this guide, that variable only contributes to the public node name. The full node-to-campaign association process still needs official confirmation. Do not describe labeling as a wallet connection, or a running miner as proof of credited QP.
You can close Termius after setup. Detached Docker containers keep running. Keep monitoring memory, free disk and restart counts; swap can cushion a memory spike but does not replace sufficient RAM.
Some links that maybe will help u
- Official server deployment instructions
- Official miner configuration
- Official Compose definition
- Docker installation on Ubuntu
- Official points program
Earlier user-provided logs demonstrate a clean Debian 13 ARM64 installation followed by troubleshooting, and a subsequently working miner and manually successful updater. They do not validate every command in this revised Ubuntu guide or establish node QP credit. An exact TGE date or airdrop in two weeks has not been established by the sources checked here.
8 Finish the short deadline quests first
The following tasks were visible on the official quest dashboard on 2 October 2026:
| Quest | Displayed quest points | Displayed countdown |
|---|---|---|
| Engage Post Collab | 100 | Ends in 2D |
| Follow Mint collab | 150 | Ends in 4D |
| Agentics Airdrop Collab | 150 | Ends in 4D |
Open each task after unlocking it, follow its current instructions and confirm the completion state. A post, follow or external action may require a separate verification step. Do not assume doing an action elsewhere automatically completes the task.
The Agentics card advertises its own external collaboration reward pool. That is not a verified Quip node allocation, and this guide does not treat that number as a guaranteed personal reward.
After the expiring tasks, work through wallet, community and repeatable tasks. The quest site shows its own referral and daily-task rules. Keep those separate from the newer canonical Points program; similar labels do not imply identical rates or schedules.
Recheck the countdowns immediately before publication and participation. Do not recycle this screenshot later as evidence that the same deadlines remain open. An old Quantum Echoes mint countdown is not evidence of an October node deadline.
9 Use Paper and Live swaps deliberately
Open QuipSwap. The header separates Paper and Live. They are not interchangeable.
Start with Paper if you want the learning route
- Select Paper in the header.
- Follow the wallet and Quip-account onboarding requested by the app.
- Review the one-off session signature in your wallet before approving it.
- Use the simulated order book according to the app’s current instructions.
- Check that completed simulated activity is recorded and later reflected in the relevant campaign balance.
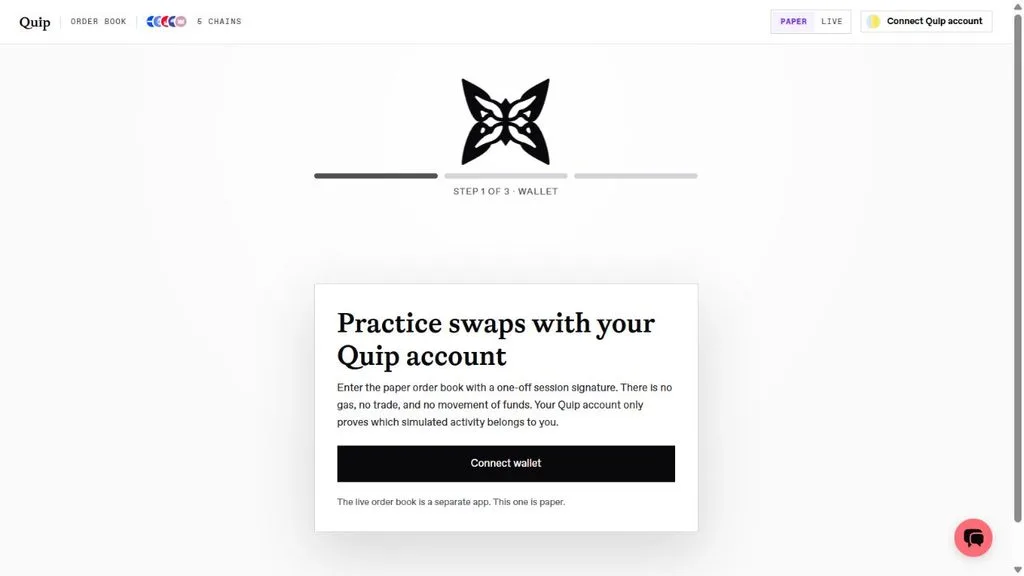
The official Paper screen states that the session has no gas, no trade and no movement of funds. Connecting still requires reviewing a wallet signature.
Live uses real assets
The public Live order book could be browsed without connecting during this check. It showed a Base deployment and an ETH listing. That is a real asset context, not a reason to send AGLS or assume the trade is a faucet-funded test.
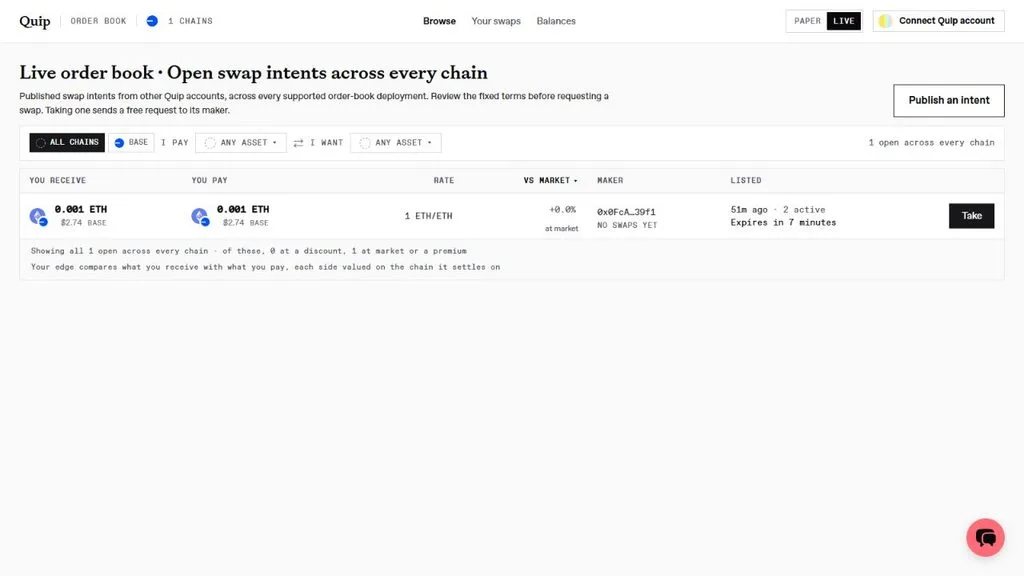
Actual public order book capture on 2 October 2026. Listings and expiry times change. The example is not a trade recommendation.
Before a live swap, check the settlement chain, assets, exact amounts, counterparty terms, expiry, gas and any permissions. A free request to a maker is not the same thing as an entirely free settlement. Only use amounts you are comfortable risking.
Real swaps became point-eligible alongside paper swaps in the official 1 October announcement. That does not justify unnecessary trading, manufacturing volume or treating points as cash. Source: official QuipSwap announcement
10 What to do when the airdrop arrives
Keep access to your signing wallet, quantum account and miner identity backup. Follow announcements from the project’s official X, Discord and websites. Do not trust a random “claim now” DM, and never type a seed phrase into a claim page.
The current program says points convert at TGE. It does not establish a fixed conversion rate, guaranteed eligibility for every node, exact claim date or a verified claim URL. When official claim instructions are released, check the correct account, chain, eligibility criteria and transaction details before signing.
Final checklist
- Check the Quip Points and track batches
- Track new Quip Quests
- Wait for the airdrop and climb the leaderboard
